
This is lesson is based upon Picasso's portraits. Pablo Picasso is famous for abstract art and cubism. In class we discuss the difference between ABSTRACT ART and CUBIST ART. Here are some of the differences...
This is an example of a CUBIST style painting created by Pablo Picasso.
This is called Factory, Horta de Ebbo:

- Little detail.
- Limited palette of colors.
- Images tend to look flat.
- Use of geometric shapes.
This is an ABSTRACT piece by Pablo Picasso called Portrait of Dora Maar:
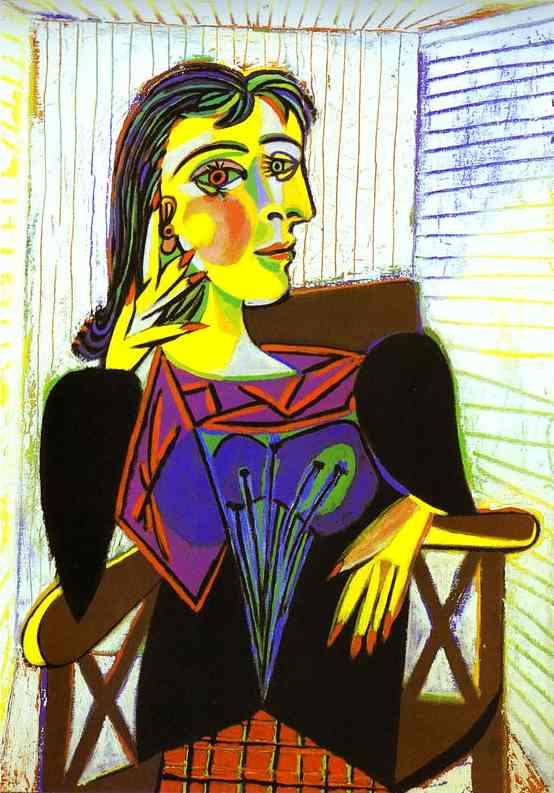
Here are some characteristics of Abstract art as compared to Cubist art:
- Distorted or changed shapes but objects are still recognizable (sometimes objects are not recognizable); not an accurate representation of an object
- more use of detail
- More use of color not necessarily realistic color
We create our own Picasso Style Portrait in a COLLAGE format. Collage can be defined as using parts of other images to create a new image. Typically we use various types of paper to do this: newspaper, magazines, photographs, tissue paper, etc.
An added note: My student teacher last year (Miss Jones) designed this awesome lesson! Thanks Miss Jones!
Teacher Preparations:
I prep the materials by tearing out numerous images of faces from magazines. I look for large images of faces- the bigger, the better. (I do this simply to eliminate the students from getting distracted by the magazines.)
I also use a template of a head and shoulders that the students can begin working with, thus ensuring an image that isn't tiny.
To create the portrait I ask the students to do the following:
- Cut out two different eyes-perhaps one is bigger than the other.
- Cut out a nose.
- Cut out a mouth.
- Please note: we don't concern ourselves with the images being male or female. In fact it makes the picture even better if the images are from males and females.
- Once the facial features are cut out, then we glue them onto the head. It's okay if they are not exactly in the correct place. Turn the eye side ways or move the nose down or off to the side.
- Next, look for hair to cut out. Pick out hair from different images and then glue them down to create one.
- Now, using your pencil add a neck line and some details to the shirt.
- Color in using crayons, colored pencils or markers. We use crayons.
- I do ask the students to use a skin tone for the face and two different colors for the shirt and background.
- Admire your newly created collage faces! The students love these.


Wow ! I was looking for inspiration and you have provided it!
ReplyDeleteTim-Yr 5 teacher in UK
Thanks for this post. My students did an amazing job on this. Thanks once again.
ReplyDelete